Thawing Chicken Wings

Thawing Chicken Wings

Thawing Wings

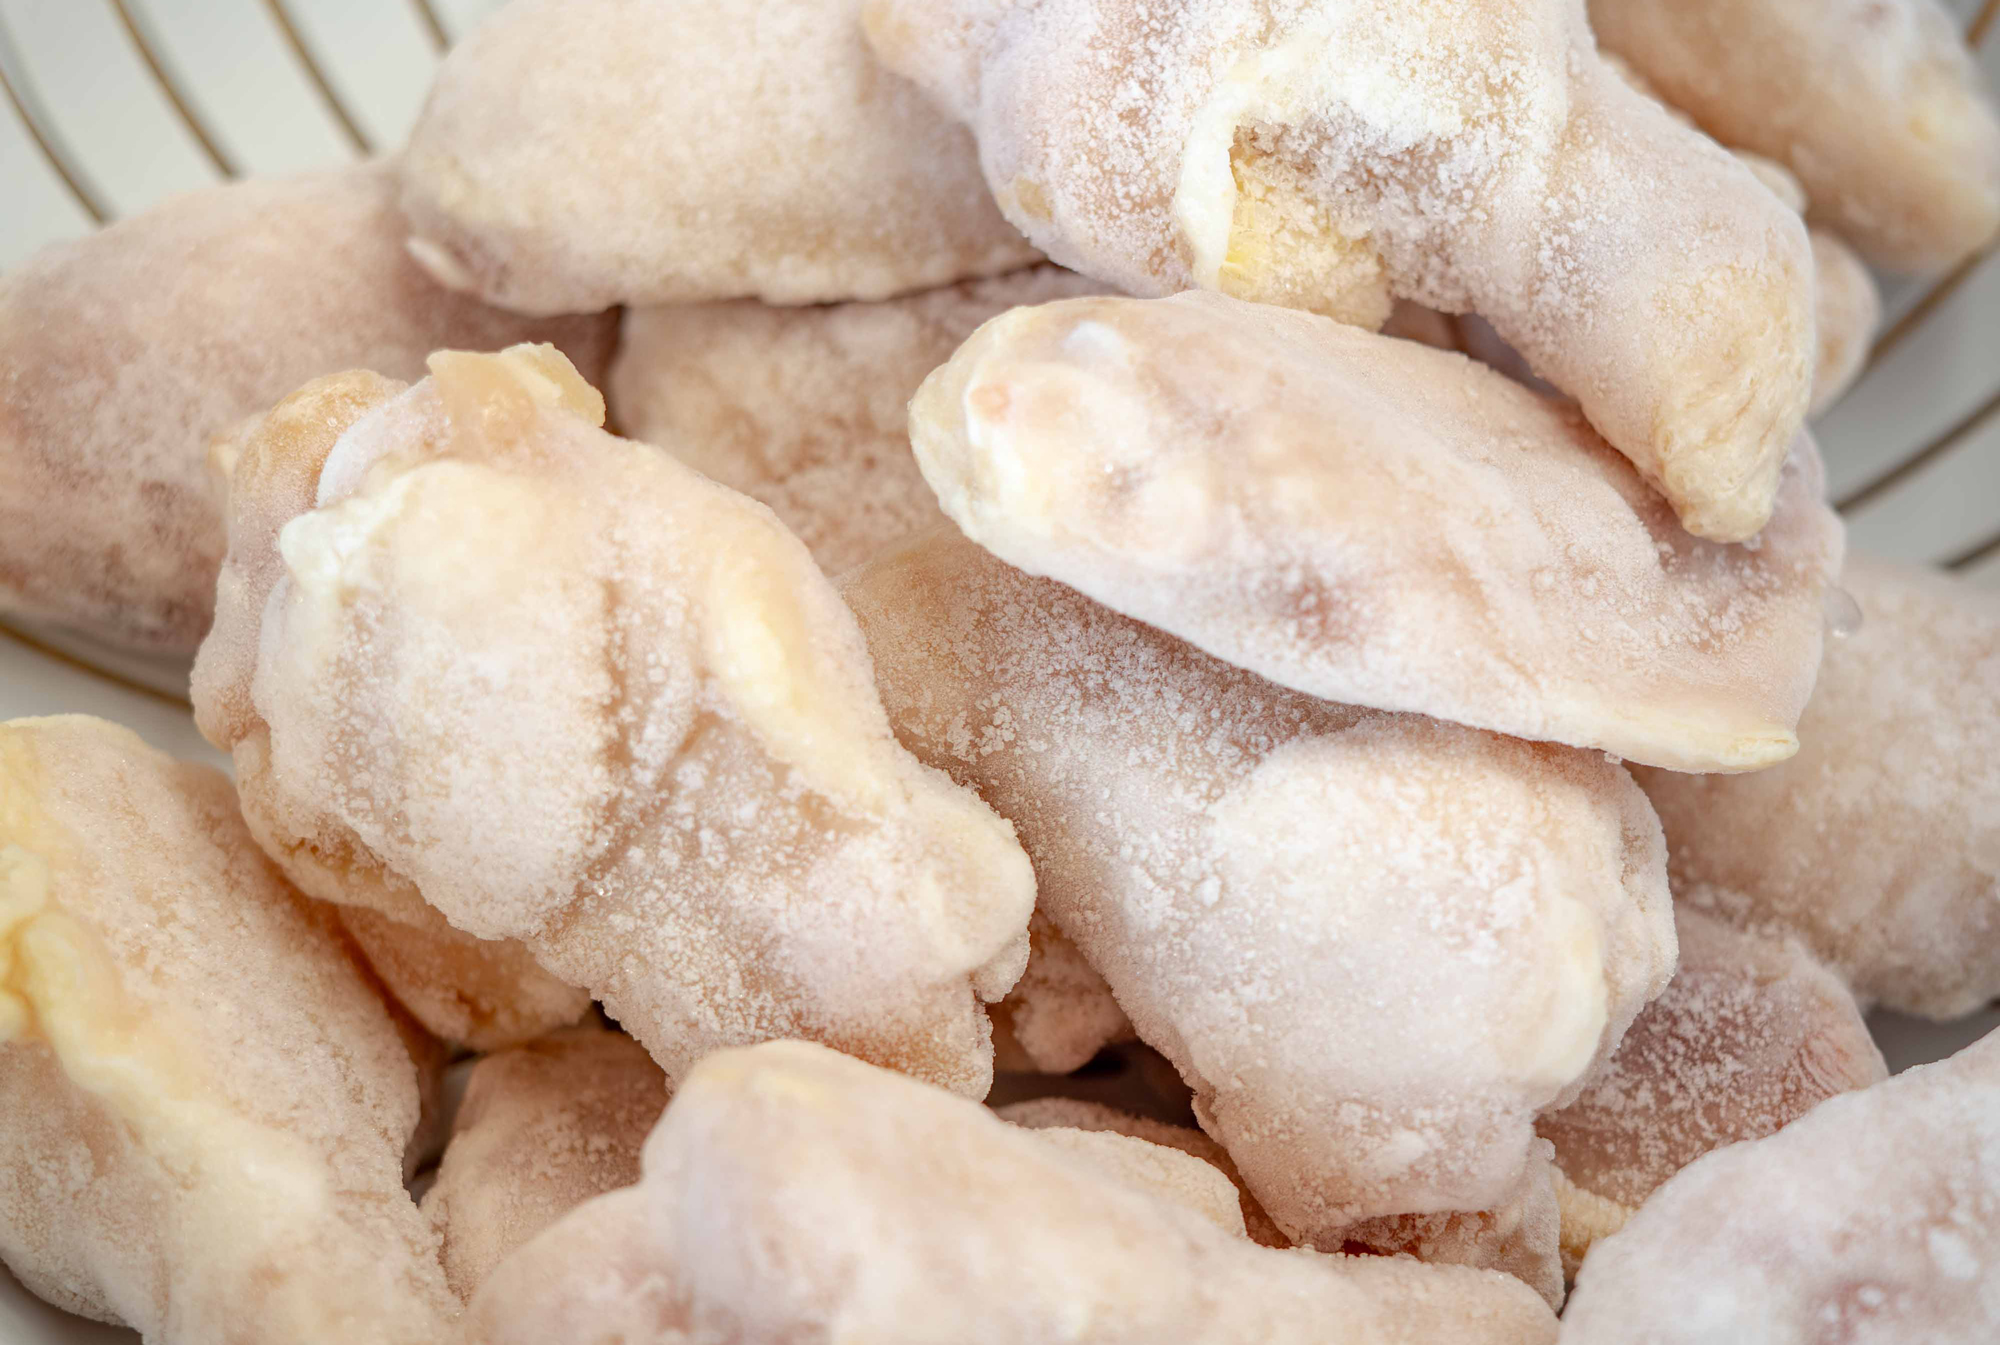
Large bags of frozen chicken wing drum and flat sections, sometimes called “party wings,” are easy to find in almost every grocery store. They are also often less expensive than fresh wings.

Once fried, if properly prepared, you will likely not be able to tell the difference between frozen and fresh wings, though not always. In my experience, frozen wings can be just as good as fresh, but they aren’t always, and I have a theory about why...

Fresh vs Frozen Wings

Fresh wings are generally more expensive because they will perish if not processed and transported quickly to the grocery store. All of that extra effort costs money.

The fact that they are fresh alone tells you they probably aren’t that old. In the store, you can get a good idea of their condition. Since they are sold in trays with only plastic wrap on top, you can usually see exactly what you are getting.

Frozen wings, on the other hand, are much harder to judge because in the processing facility they are rapidly frozen, coated in ice and then sealed in bags to help preserve and protect them. Unlike fresh wings in a tray, you can tell very little from looking at a large bag of frozen wings.

One thing to check is whether the wings are still separate. One solid block of ice with wings sticking out of it is usually a bad sign.

They also tend to cost less than fresh because freezing gives manufacturers, distributors and grocery stores much more flexibility. Under the right conditions, frozen wings can be stored for months and transported long distances with far less urgency and less waste.

Frozen Wing Theory

After they are processed and bagged in the factory, the wings may travel through trucks, warehouses, distribution centers and grocery stores before reaching your freezer. Along the way, there are many opportunities for delays, temperature fluctuations, partial thaws, refreezes, equipment failures, human error and inefficiencies. Once in the store freezer, doors may be opened frequently or left open accidentally. Someone might even place the wings in their cart and return them an hour later before checking out.

Many partial thaws and refreezes will likely impact wing quality and could affect our ability to create the kind of Buffalo wings we spend so much time obsessing over.

Having said all that, I use frozen wings often and they frequently turn out great. The best thing you can do is find a brand you like and a store you trust. If they are good one time, there’s a good chance they will continue coming from the same place and be treated the same way.

Danger Zone

What is the danger zone? It’s the temperature range between 40°F (4°C) and 140°F (60°C) where bacteria are happiest and reproduce quickly. Raw chicken should stay out of this range as much as possible.

Don’t panic, you have some time. According to the USDA, you generally have about 2 hours to work with raw chicken while it is in the danger zone, or about 1 hour in temperatures above 90°F (32°C).

This is why refrigerator thawing is recommended and why wings should never be thawed on the counter or with hot water.

When thawing wings, store raw chicken on the bottom shelf and sanitize surfaces that come into contact with the chicken or packaging. This includes countertops, trays, utensils, refrigerator surfaces and even the sink.

Thawing

There are several ways to thaw chicken wings, each with its own advantages and disadvantages. Some methods are faster while others produce more consistent results.

I recommend refrigerator thawing whenever possible.

It produces the most consistent wing quality and gives excess ice and moisture time to drain away before frying. Cold water thawing works well when you are short on time but isn't exactly quick, requires more attention, and may produce less consistent results. Microwave thawing works in an emergency but will often partially cook the wings and produce unpredictable results.

Refrigerator Thawing (Recommended)

A five-to-ten-pound bag of frozen wings should thaw within 24 hours but could take longer depending on how cold your refrigerator is and how you set it up.

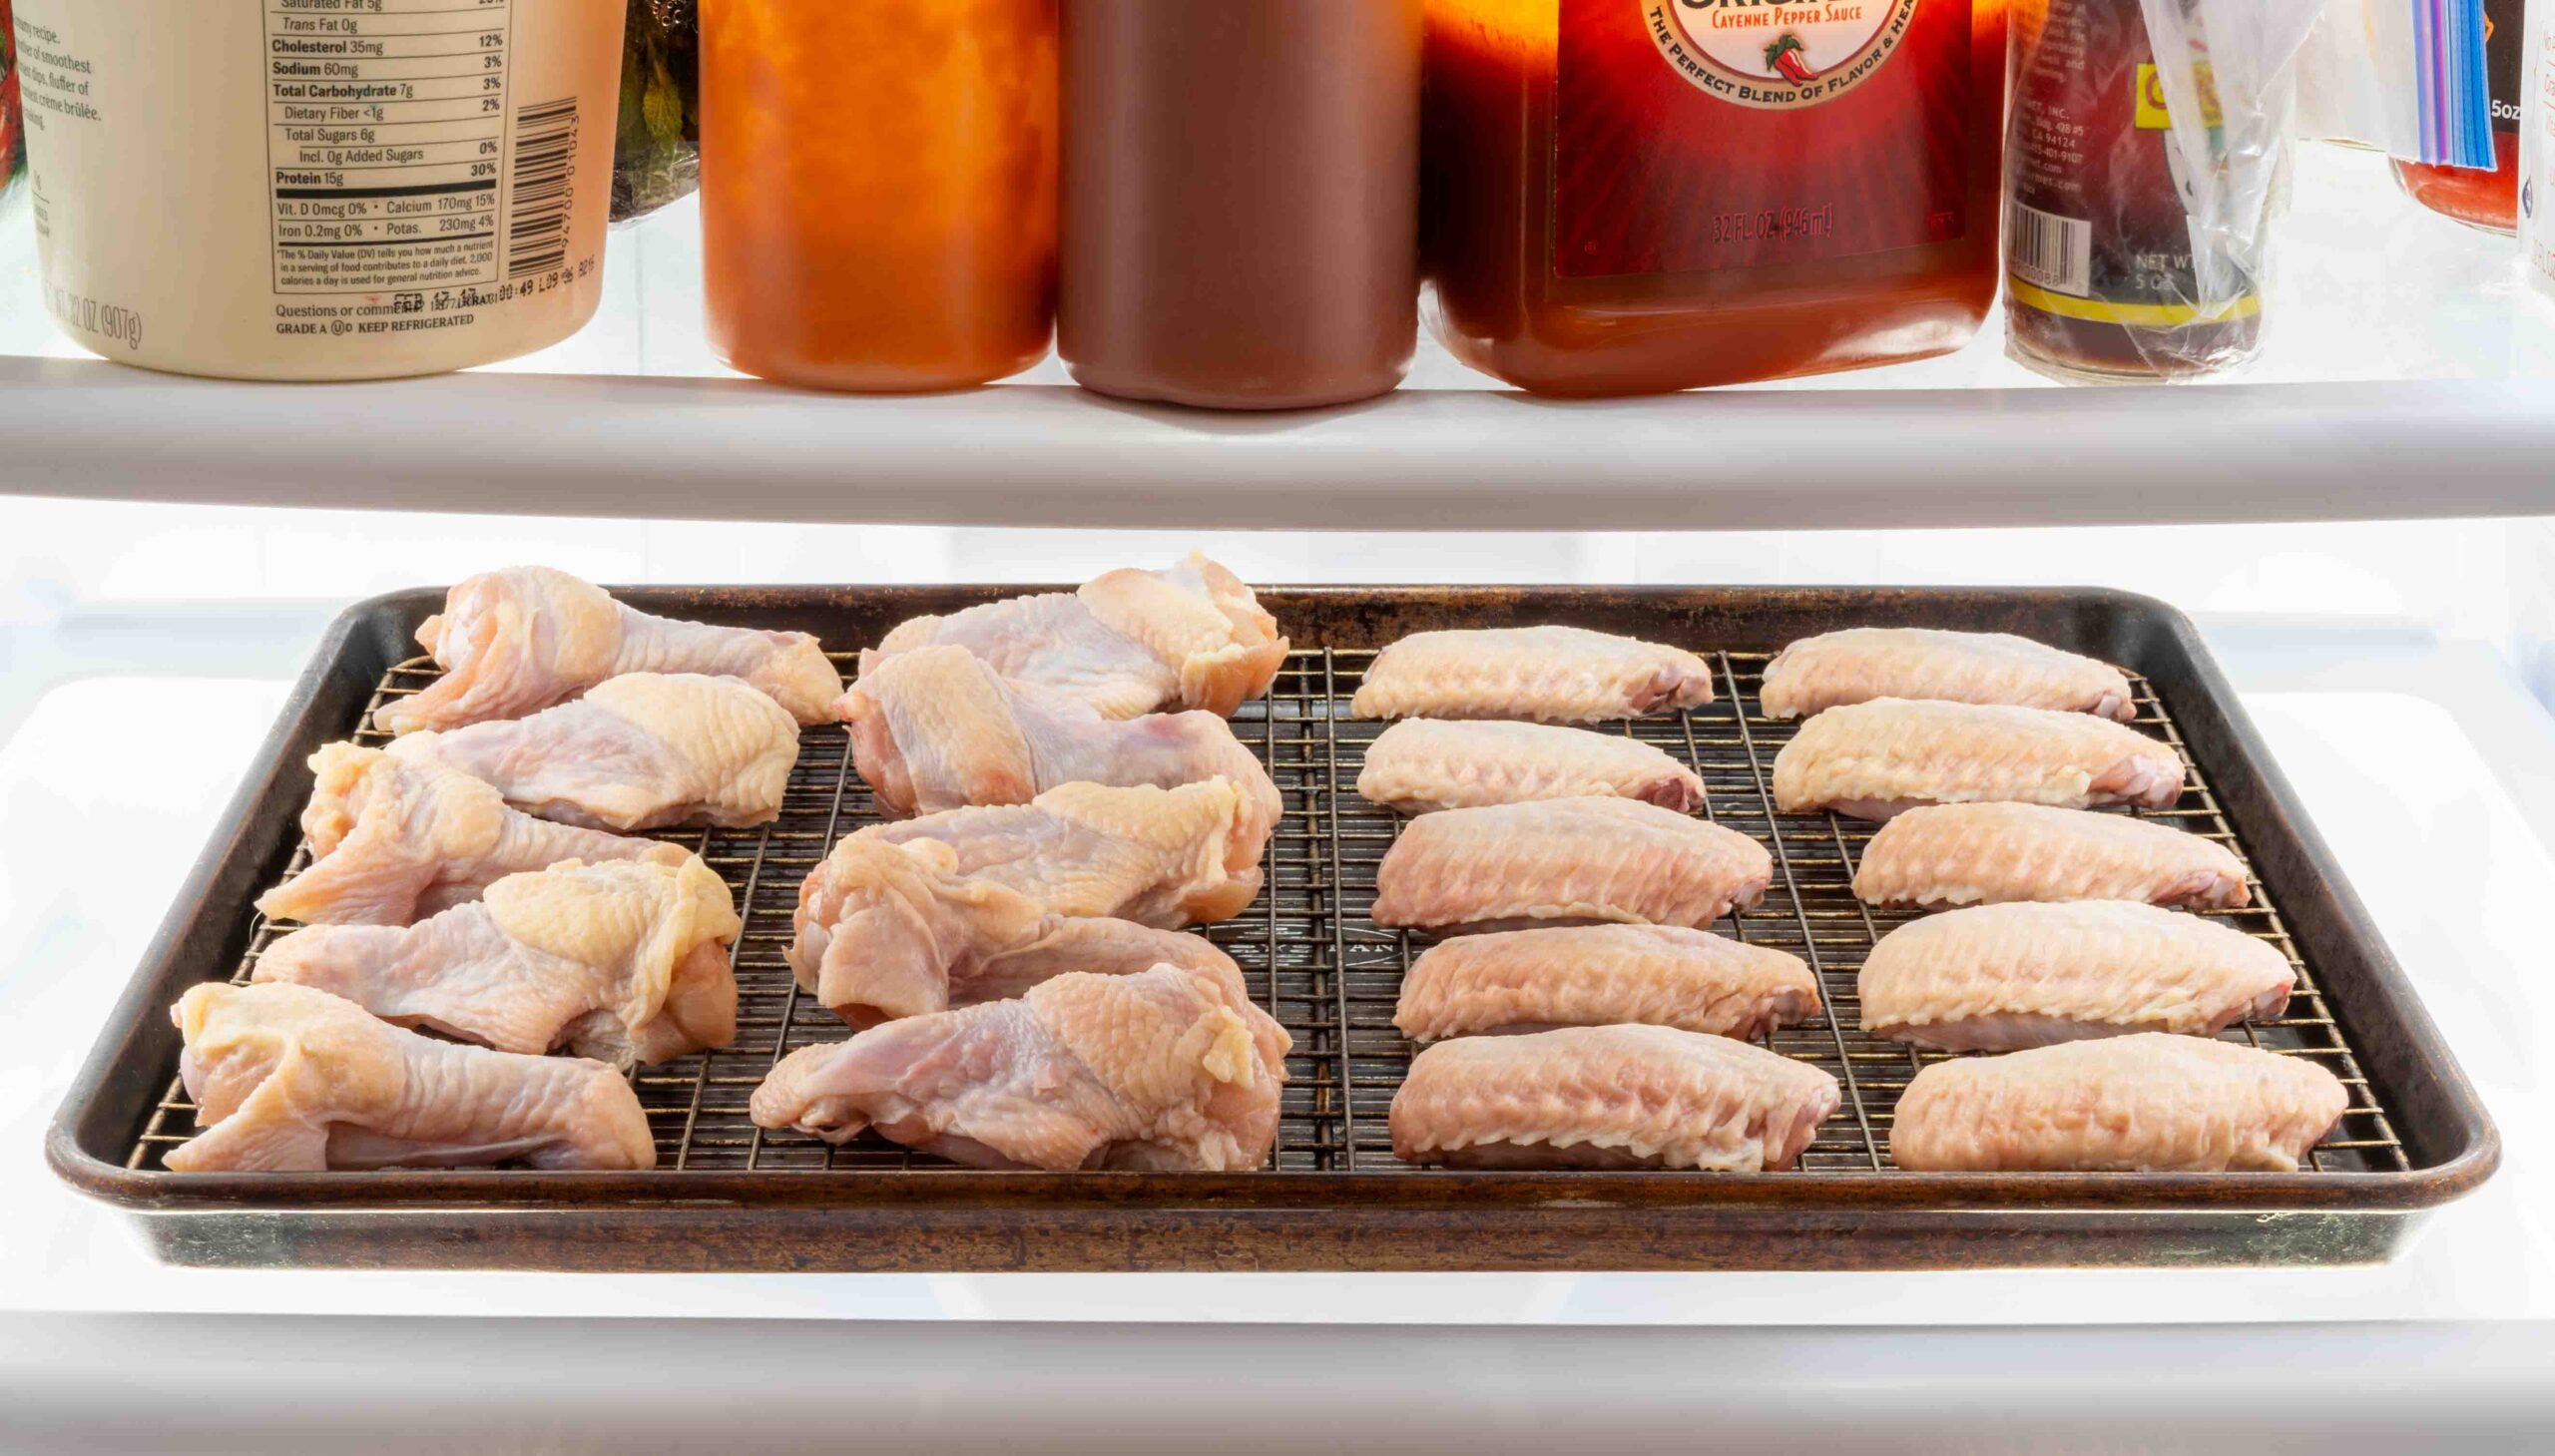
The easiest way is to simply place the bag of party wings on a baking sheet and put it on the bottom shelf of the refrigerator, but it’s not ideal.

Frozen wings are coated in extra ice, which becomes extra water. Thawing the wings over something with holes, such as a colander or a wire rack over a baking sheet, will allow that extra water to drain away and that’s exactly what we want.

The less moisture the wings contain before the drying process begins, the faster they will dry and the crispier the skin can become. This is even more important if you plan to skip the drying stage entirely.

Wet wings can also cause dangerous splattering and possible oil overflow when added to hot fryer oil.

Cold Water Thawing

Cold water thawing is my second favorite thawing method. It will thaw the wings just as well as refrigerator thawing, but it won’t remove as much water.

This just means you will want to dry them off as well as possible with paper towels before frying.

Here’s how to do it:

  1. Fill a large bowl or container with cold water.
  2. Put your frozen wings in a bag without holes and remove as much air as possible.
  3. Put your bag of wings in the bowl of cold water. The bag may float, so weigh it down with something to keep it fully submerged.
  4. Replace the water with fresh cold water every 30 minutes until the wings are thawed.

Keep the wing temperature out of the danger zone. They should not be allowed to rise above 40°F.

Also, do not run frozen wings directly under cold water as this can negatively impact skin and meat quality.

Microwave Thawing (Not Recommended)

Microwave thawing will produce unpredictable results. Microwaves do not thaw wings evenly.

No matter how low you set the power or how often you stop to flip or move the wings around, some parts of the wings will heat and cook faster than others.

In the end, you will likely be left with some wings that are partly cooked while others are still frozen. You may even have wings that are both cooked and frozen at the same time.

If your goal is to make perfect Buffalo wings, this is not the way to do it.

However, if you are still desperate enough to use the microwave, the following guidelines may help produce slightly less bad results.

Keep in mind that microwaves, depending on the make and model, have different wattages and power levels, making it impossible to create a process with repeatable results that will work with all models.

Assuming you are using party wings that are frozen but all separate:

  • Spread the frozen wings over a shallow microwave-safe dish in as even a layer as possible.
  • Use the lowest or close to the lowest defrost setting available on your microwave. About 20% to 30% power usually works well.
  • Only thaw about 2 to 3 pounds at a time.
  • Microwave for about 5 minutes, then rearrange, rotate, and flip the wings. Allow them to rest for a few minutes. If you notice overly hot spots or obvious cooking, reduce the power and time slightly for the next round.
  • Repeat as many times as necessary until the wings are no longer frozen solid.
  • Finish the last bit of thawing using the cold water method by putting the wings in a zipper bag and submerging them in cold water until the wings are thawed but still under 40°F. At this point, it should not take long.

This last part is important because there is more risk of cooking the wings near the end of the thawing process.

And Don’t Forget

Regardless of how you choose to thaw your chicken wings, remove as much excess water as possible before moving on to the next step, whether that is seasoning and frying or seasoning and drying in the fridge.

The less moisture the wings contain, the safer they will be to fry, and the crispier the skin can become.

Cutting Chicken Wings

Cutting Chicken Wings

Cutting Wings

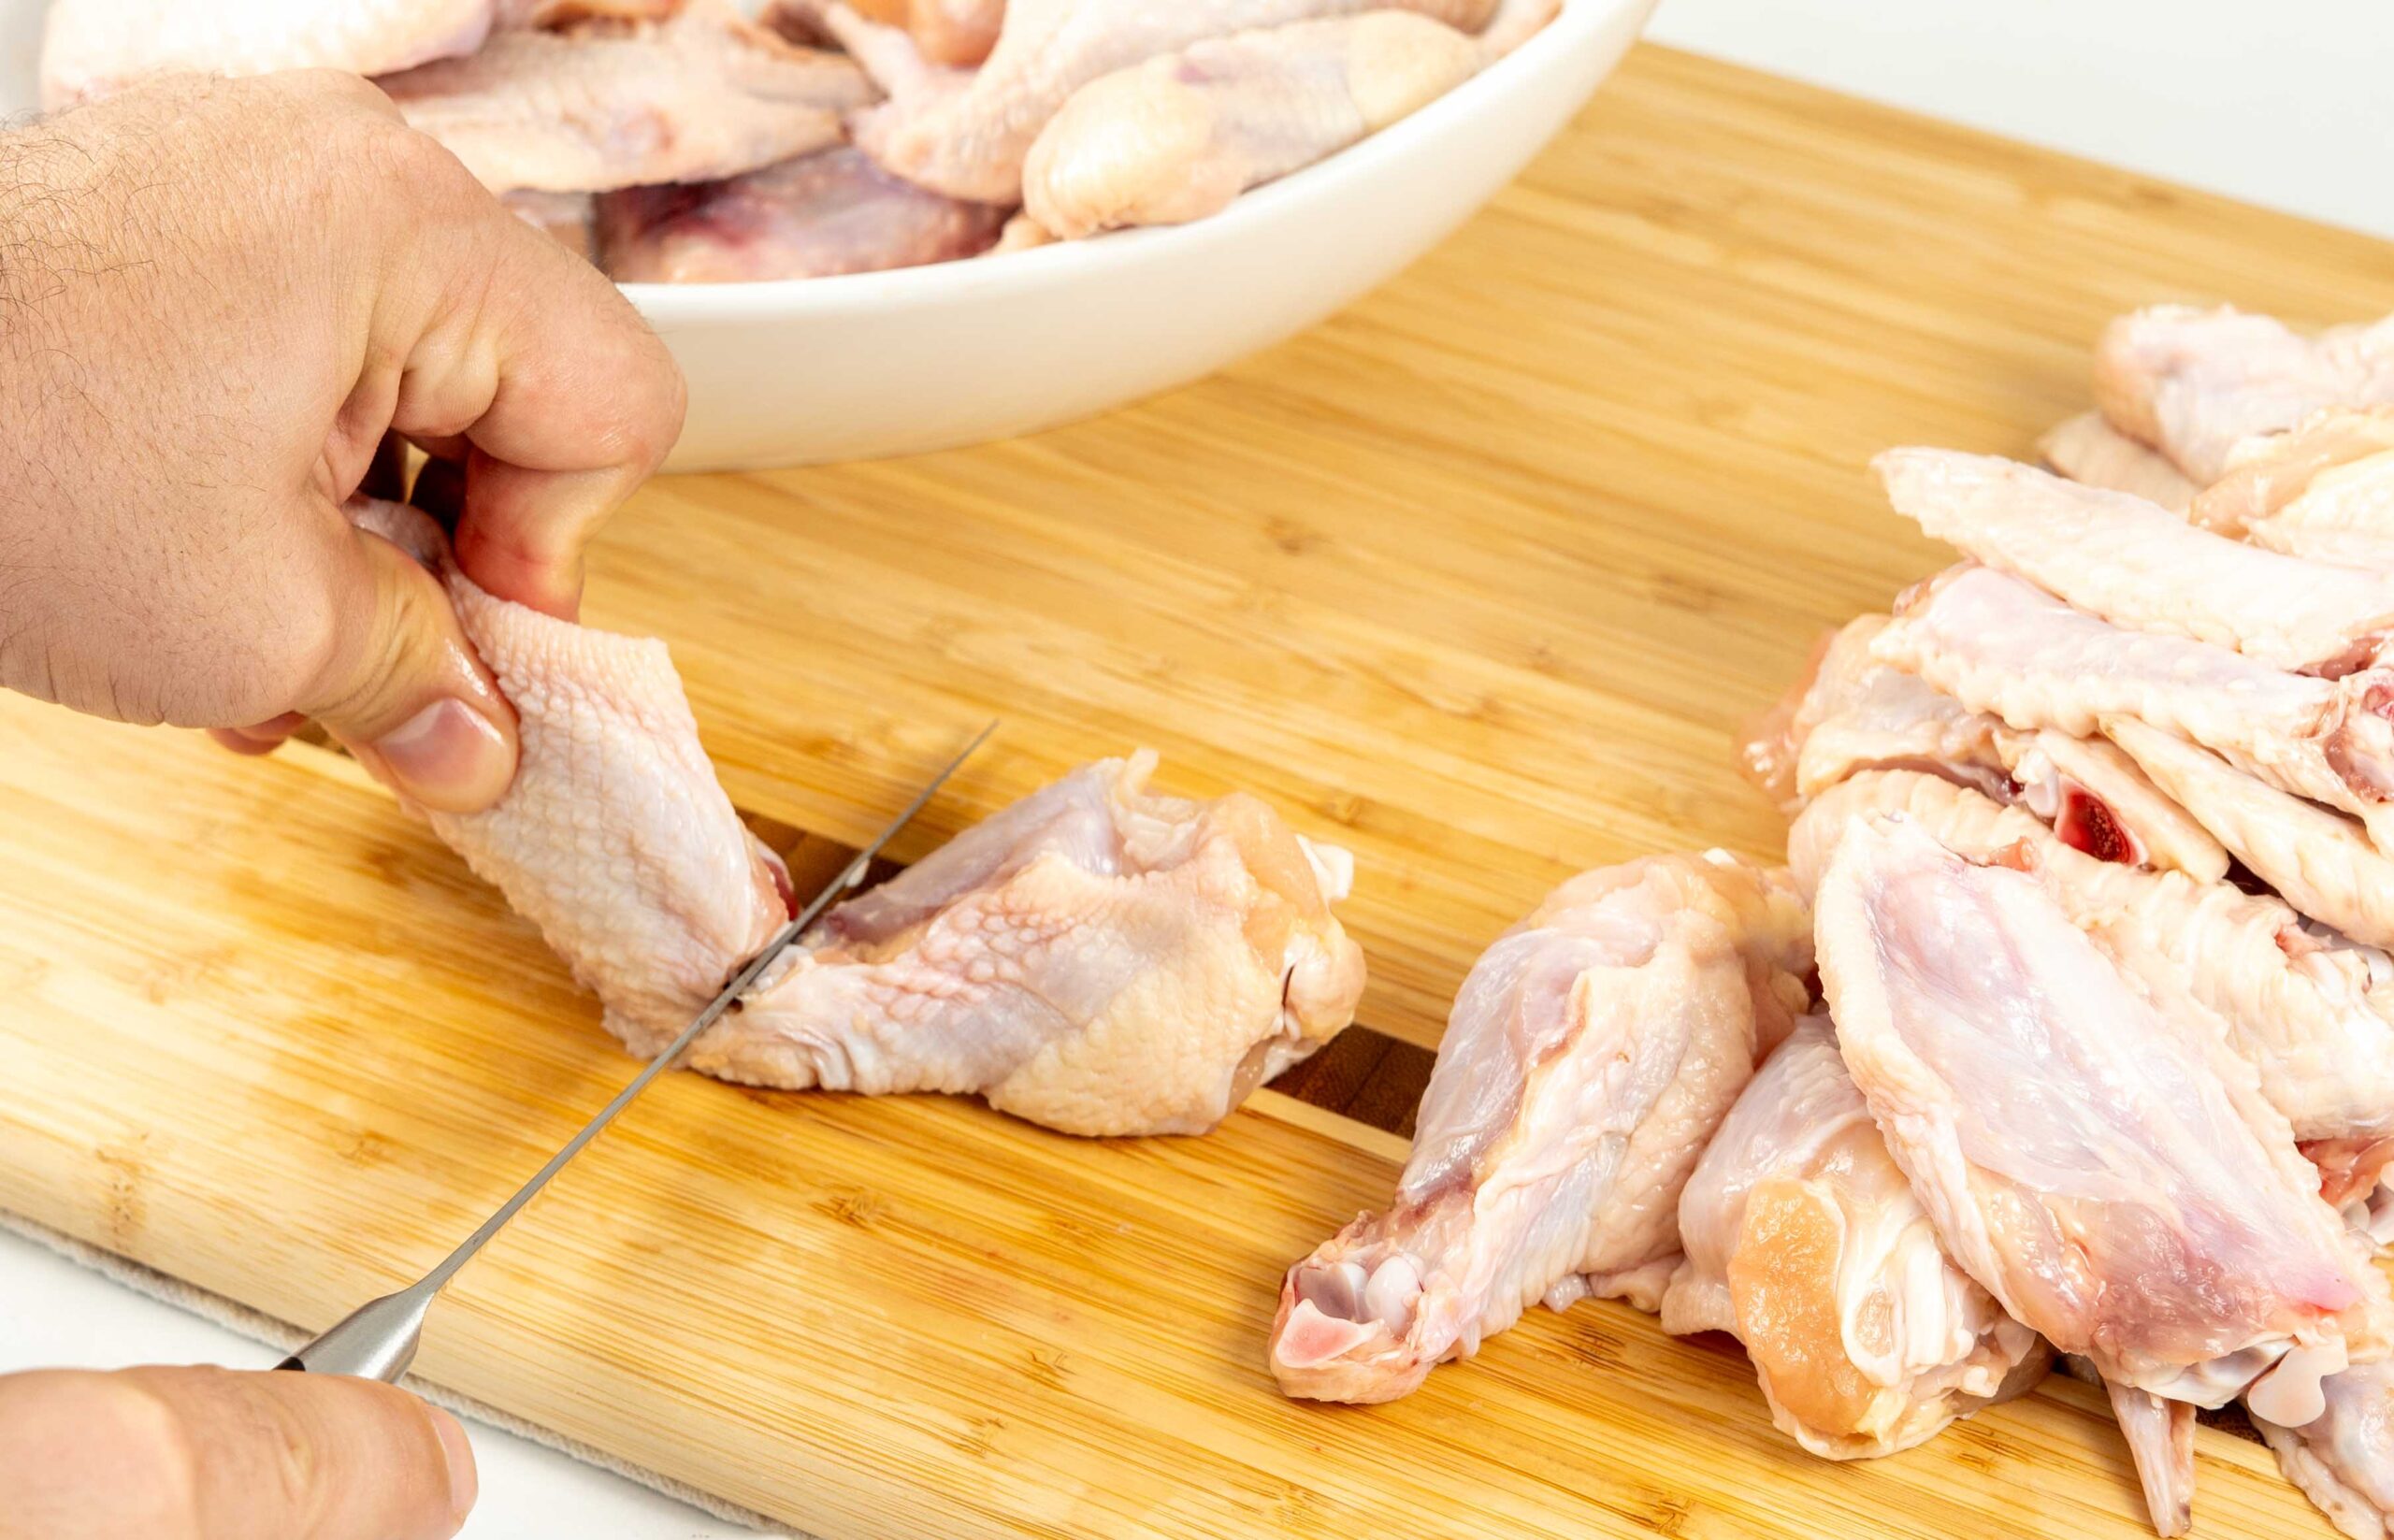
Depending on how you buy your wings, cutting wings is not always necessary, but it is a valuable skill to possess. I prefer to use fresh wings whenever possible because I find they give me consistently good results. They usually come as whole wings before being separated into sections. The sections are the drumette or drum, the wingette or flat, and the tip.

Frozen wings are often sold as pre-divided "party wings" but are also sold as uncut whole wings. You will need to defrost them, at least partially, enough to separate the wings from each other before cutting. I find slightly frozen wings are actually a little easier to cut.

Before Cutting

Start by getting your work area set up. Grab a good solid cutting board that won’t move easily and a sharp knife.

Using the Right Knife: Just about any sharp knife will work, but the sharper the better. I prefer to use a chef's knife because it's comfortable, easy to control and has enough weight to make clean cuts through the joints.

Safety and Cleanliness: Keep your chicken wing cutting operation to a dedicated, clutter free area. When finished, be sure to clean and sanitize any tools and surfaces used, including the countertop and sink

Food Safety Note:
Avoid the “Danger Zone.” Bacteria can grow at an accelerated rate when raw chicken is between 40 - 140°F. According to the USDA, raw chicken should not remain in this temperature range for more than two hours. Don’t leave your wings sitting out longer than necessary while cutting. Once finished, either return them to the refrigerator or move on to frying.

Cutting

1. Place one full, defrosted, uncut chicken wing on the cutting board.

2. Find the joint between the bones and slice through it. You will be cutting through skin, tendons, ligaments and cartilage. If you hit the bone, you’ll know it right away. It takes some practice but once you know where to cut, a sharp knife will almost slide right through.

Full raw chicken wing

Drum/Flat:

  1. Hold the wing stable on the cutting board.
  2. Expose the joint between the drum and flat sections by straightening the wing slightly.
  3. Cut through the skin, down from the drumstick and through the joint’s connective tissue.

Remove the tip:

    1. Hold the wing stable on the cutting board.
    2. Expose the joint between the flat and tip sections by straightening the wing slightly.
    3. Cut through the skin and through the joint’s connective tissue.

    Chicken Wing Tip:

    Discard the tips or use them to make chicken stock.

    Next Steps

    Once separated, the wings are ready for seasoning and then drying or frying. Don’t forget to properly clean and sanitize all tools and surfaces exposed to raw chicken.

    Seasoning Chicken Wings

    Seasoning Chicken Wings

    Seasoning Chicken wings

    For deep fried Buffalo wings, seasoning can be summed up in three words:

    Just add salt!

    Raw chicken wings should be salted before cooking. At the very least, wings should be salted a few minutes before frying, but more time is better. The gold standard is to salt the wings before drying them uncovered in the fridge. This helps remove moisture from the skin for crispier wings while also giving the salt time to penetrate and season the meat.

    Adding the Salt

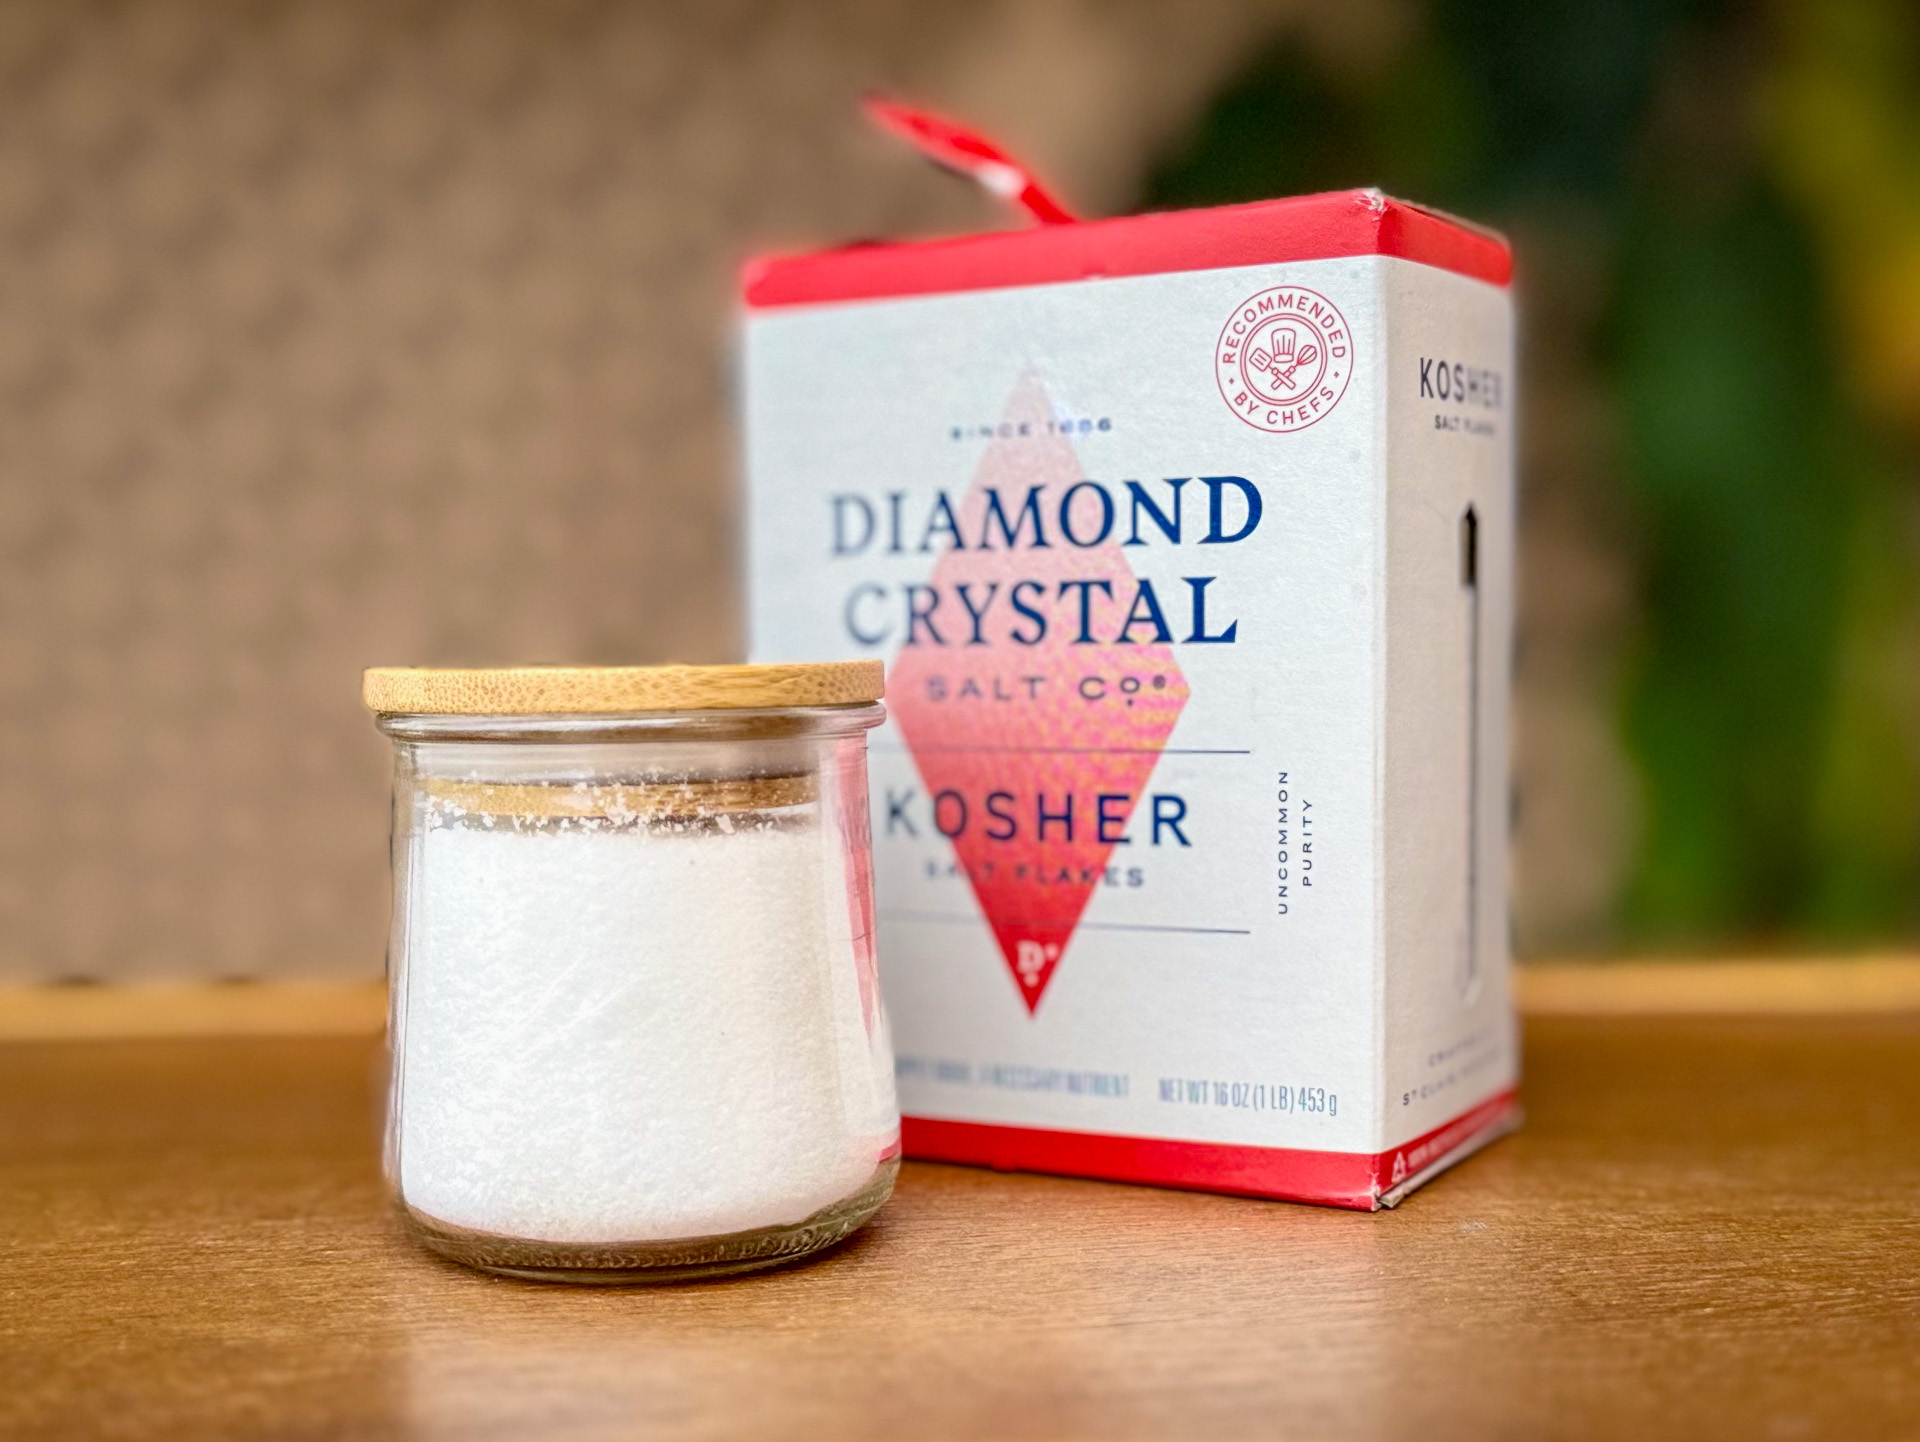
    • 1/2 tsp kosher salt per pound of wings
      or
    • 1/4 tsp regular table salt per pound

    Kosher salt is larger and less dense than table salt so you need more by volume to get the same result.

    Add thawed, separated, and drained wings to a large bowl. The wings should not be dripping wet after draining. If necessary, pat them dry with paper towels before seasoning.

    Add salt according to the weight of the chicken, then mix well to evenly coat the wings.

    When to Salt

    • If planning to fry right away, salt after drying the wings. The raw wings will still be moist enough for the salt to stick to the skin.
    • If drying wings overnight or longer, salt before they go into the fridge. The wings will still be moist enough for the salt to stick to the skin, and over time the salt will absorb into the skin and meat for more even seasoning.
    • Adding salt only after frying mainly increases the saltiness of the Buffalo sauce while leaving the meat inside less seasoned.

    Spices

    • If adding black pepper, cayenne pepper, garlic powder, or other spices, the time to do it is when you add the salt, but I generally don’t think they are necessary for a few reasons.
      • These spices can come off in the fryer oil, contaminating the oil and shortening its life.
      • Once wings are coated in Buffalo wing sauce and dipped in blue cheese dressing, it becomes difficult to taste those extra spices anyway because many of the same flavors already exist in the sauce and dressing.

    Salt is different from the other seasonings mentioned above. Given enough time, salt penetrates into the skin and meat itself. Even when covered in Buffalo sauce and blue cheese dressing, a lack of salt inside the wing will still be noticeable.

    The wings are now ready for the drying rack or the fryer.

    Drying Chicken Wings for Crispy Skin

    Drying Chicken Wings for Crispy Skin

    Drying Wings

    The difference between average Buffalo wings and great Buffalo wings often comes down to texture. Prepared incorrectly, the skin can end up rubbery or the meat can become tough and dry.

    In my experience, the problem can usually be traced back to two things.

    Oil Temperature: When frying, the required oil temperature is not maintained. Many fryers start hot enough but struggle to maintain temperature after cold wings are added. Oil temperature will be covered in exhaustive detail in the Frying Wings article.

    Wing Dryness: Wings are not dry when they go into the fryer. Drying wings is another simple way to improve texture and create crisp skin without drying out the meat.

    How to Dry Wings

    1. Season the wings: I recommend 1/2 tsp kosher salt or 1/4 tsp regular table salt per pound of wings. Salt improves flavor and works well with the drying process. See the wing seasoning article Here.
    2. Spread them out: Place wings on a wire rack over a baking sheet. Avoid crowding; they need airflow on all sides.
    3. Refrigerate: Take precautions to prevent raw chicken from contaminating other foods, including keeping the tray on the bottom shelf of the refrigerator.
    4. Let them dry: Leave the wings uncovered for 24 to 48 hours. Too little time and the skin won't dry enough. Too much time and the skin may become leathery.

    Danger Zone

    What is the danger zone? It’s the temperature range between 40°F (4°C) and 140°F (60°C) where bacteria are happiest and reproduce quickly. Raw chicken should stay out of this range as much as possible. In general, wings should either be in the refrigerator or in the fryer.

    Don’t panic, you have some time. According to the USDA, you generally have about 2 hours to work with raw chicken while it is in the danger zone, or about 1 hour in temperatures above 90°F (32°C).

    When drying wings, store raw chicken on the bottom shelf and sanitize surfaces that come into contact with the chicken during preparation, drying and frying. This includes countertops, trays, wire racks, utensils, refrigerator surfaces and even the sink.

    Controlling Humidity

    Drying time depends heavily on your refrigerator conditions. A brand new refrigerator in a dry climate with very little inside will not have to work as hard as an older refrigerator in a humid climate that is packed with food and constantly being opened.

    Your refrigerator’s airflow and ability to remove moisture will absolutely affect drying time. If wings don’t appear to get any drier after 24 hours, you may need to make some adjustments.

    You can use a hygrometer to monitor the humidity in your refrigerator. You can find a link to the one I use in my Buffalo Wing Kitchen Tools article. It’s inexpensive and connects to an app on your phone via Bluetooth, allowing you to monitor humidity without opening the refrigerator door and letting more humidity in.

    Lower humidity generally means faster drying. Around 40% humidity seems to work very well for drying wings. Once humidity climbs above 60%, drying slows noticeably.

    Don’t worry too much if the humidity shoots up after adding the wings. They are wet, so that is normal. The humidity should slowly drop as the wings dry.

    Things You Can Do to Reduce Humidity

    • Seal or remove moisture-heavy foods like soups and uncovered vegetables. Keeping these foods in the bottom drawers should also help reduce humidity.
    • Defrost the fridge ahead of time. Refrigerators, even new ones, benefit from occasional defrosting to help remove moisture.
    • Consider adding a padlock to the refrigerator door so family members are unable to disrupt the very important business.

    Why Drying Works

    Why does drying wings improve Buffalo wings? When done right, drying allows the fryer to crisp the skin while the skin protects the meat underneath from overcooking and drying out.

    Removing Water

    This may seem obvious but drying wings removes water mostly from the wing’s outer layer, otherwise known as the skin, before the wings ever hit the oil. This gives the fryer a head start and helps crisp the skin without extra time in the oil that could overcook and dry out the meat underneath.

    Obviously there is a lot more happening during frying than just water removal. Fat is rendering, proteins are changing and all kinds of other reactions are taking place. For those interested, very nerdy wing science articles are coming in the future. For now, understanding water and skin texture is what matters most when it comes to making better Buffalo wings at home.

    Skin Protection

    Wet chicken skin is loose and floppy in the fryer, allowing hot oil to move around underneath more easily.

    During the drying process, the skin shrinks and tightens against the meat underneath. At the same time, moisture trapped between the skin and meat condenses and starts acting like a glue, helping the skin cling more tightly to the meat. This prevents oil from getting underneath the skin.

    You can actually see the difference. Before drying, the skin hangs loosely from the wing. After drying, it tightens against the meat and naturally clings in place.

    The skin acts as a protective barrier between the hot oil and the meat, helping keep the meat moist and juicy while the outside crisps.

    What Good Texture Looks Like

    Honestly, I’m not sure I can fully articulate what perfect texture is supposed to be. It’s more of a spectrum we want to stay within.

    For me, the perfect crisp skin looks (or sounds) something like this. I want to hear a crunch as my teeth bite into and tear through the skin of a hot Buffalo wing. The skin should be light and airy with tiny blisters and bubbles that create crispness without becoming tough.

    There are good and bad ends of that range. On one side: undercooked, rubbery skin with no crisp at all. On the other side: skin that is unpleasant because it is dense and more like fried cardboard. Even if it is dry and crunchy, if it becomes hard to bite through or difficult to tear, it has gone too far.

    Drying Wings at Scale

    Drying wings at scale at home creates problems restaurants rarely have to think about. Commercial kitchens often have dedicated refrigeration, more airflow, more space and equipment designed for food production. At home, you are trying to dry trays of chicken wings in the same refrigerator your family opens every five minutes looking for juice.

    My wife loves coming home to find the entire fridge compressed onto the top shelf while the middle and bottom shelves are filled with racks of chicken wings. Eventually, I came up with a solution.

    Some people have kegerators, wine fridges or cigar humidors. I have a Buffalo wing drying fridge and I’m proud of it!

    Pro Tips

    • Watch for condensation: Cover wings with plastic wrap or place them in a zipper bag after removing them from the refrigerator and before frying. This prevents condensation from forming on the skin and reducing the benefit of all your drying efforts.
    • Dry wings are also less likely to stick to fryer baskets and baking trays.
    • Water and hot oil don’t mix: The wetter your wings are, the more splatter and overflow risk you create during frying. More on this in the Frying Wings article.
    • Short on time? Do your best to get the wings as dry as possible before frying. Paper towels work well. At the very least, wings should never be wet enough for water to drip off when dropping them into the fryer. Water can be dangerous in hot oil!

    Drying Skin is Not a New Idea or Unique to Buffalo Wings

    Drying poultry skin before cooking is not unique to Buffalo wings. Peking duck is another famous example of skin preparation being critical to texture and has reportedly been prepared this way since the 1300s. Different methods are used, but the goal is similar: dry the skin enough for it to become thin and crisp during cooking.

    The same basic principle shows up in everyday cooking too. Many chicken recipes suggest drying skin-on thighs, breasts and drums before broiling or grilling to help crisp the skin.